How to Convert Text to Columns in Excel
Text to Columns is a handy feature in Microsoft Excel that splits text into multiple columns.
This tool can be helpful when you are importing information from different databases. In this tutorial, let us see how to convert text to columns in Excel.
Text to Columns Tool in Excel
Text to Columns can be accessed by selecting the dataset and then proceeding to Data > Data Tools > Text to Columns.

Using this method would open the Convert Text to Columns Wizard.
You can also use the keyboard shortcut – ALT + A + E to access the text to column wizard.
Let's look at some of the cool things you can do with Text to Columns in Excel. And learn how to convert text to columns in Excel.
Example:
1. Split Names into First Name and Last Name
Let us consider this as your database. Now your task is to split the text into two columns, namely first name and last name.

You can easily split the first name and the last name into separate cells by following these steps.
- Select the data set you want to separate.
- Text to Columns may be found under Data > Data Tools > Text to Columns. Then the Convert Text to Columns Wizard will appear.
- Before separating the text into columns, this wizard involves three steps and asks for some user input.
Step 1: Make sure Delimited is chosen, and then click Next.
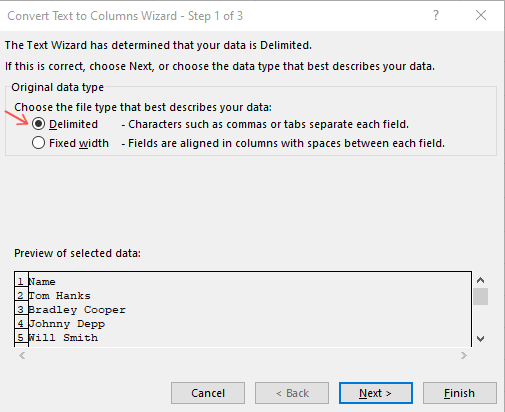
Step 2: Choose Space as the denominator, and make sure the ‘Treat consecutive delimiters as one’ option is checked. Click on Next.
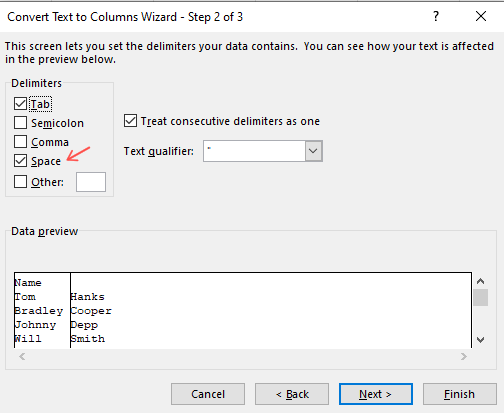
Step 3: In the last step, change the destination to $B$2 to avoid Excel overwriting the existing data set. Click the Finish button.
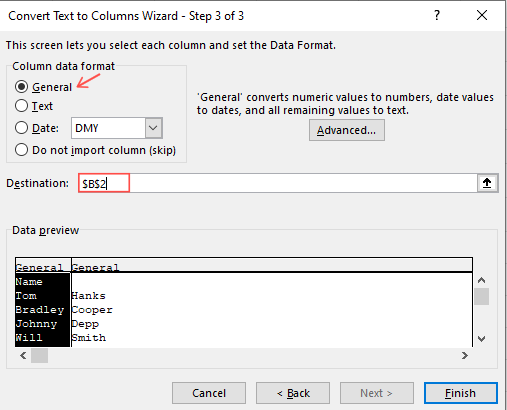
And now you have the new data set with First name and Last name in 2 separate columns.
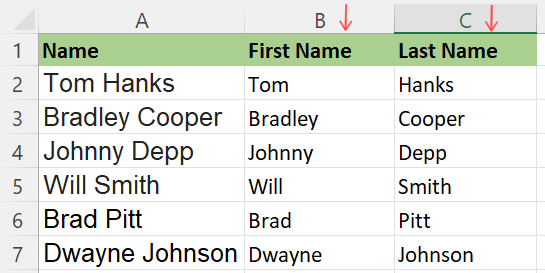
Now that you know how to convert text to columns in Excel, let us explore a few more scenarios where the text to columns tool can be helpful.
2. Using Custom Delimiters
The previous example made use of predefined delimiters. What if you came across a scenario where you had to split the text for an unknown delimiter?
That is where custom delimiters come into use.
Let's say you have a set of data with states with their Pincode separated by '-' as shown in the example below.
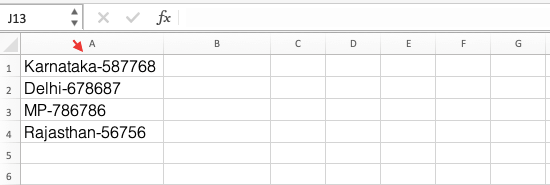
In this scenario, you choose the custom delimiter option in Step 2 and type in the delimiter "-" in the space provided, as shown in the example below.
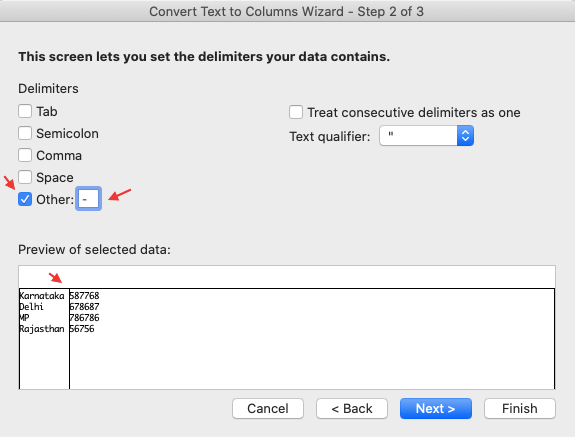
Follow the same steps, and the result would be this:

3. Convert Invalid Date Formats into Valid Date Formats
When you import data from a text file or databases like SAP/Oracle/Capital IQ, there are chances that Excel may not be able to translate the date format correctly.
Excel understands only a few formats, and any other type needs to be converted into a valid format before being used in Excel.
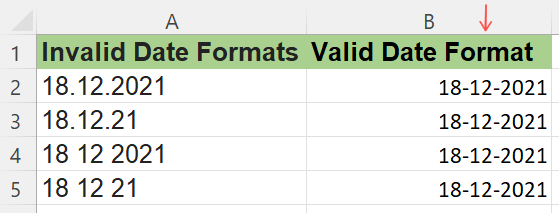
The date formats shown below are not recognized by Excel.
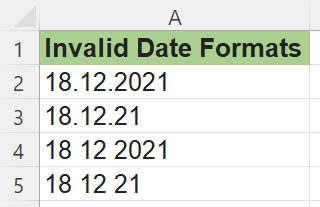
To convert these into valid date formats, follow these steps:
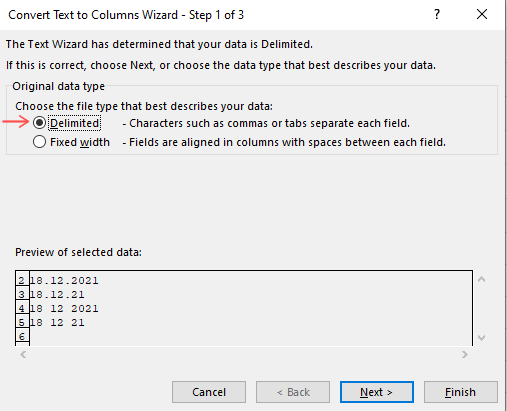
Select the data set and go to Data → Data Tools → Text to Columns. You will get the Convert Text to Columns Wizard as previously seen.
Step 1: Make sure Delimited is chosen, and then click Next.
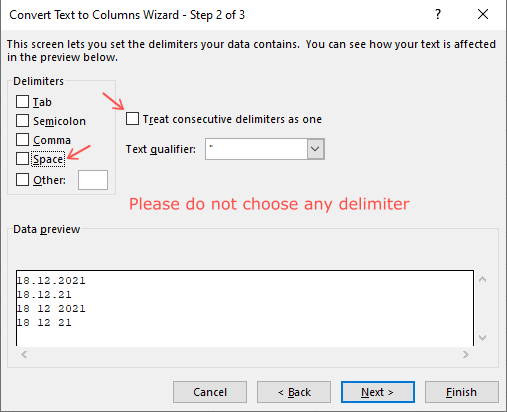
Step 2: In this step, do not choose any delimiter.
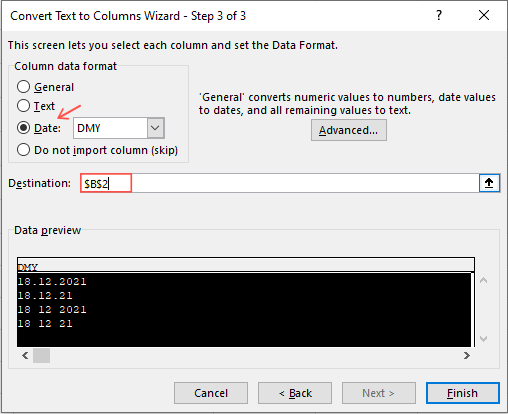
Step 3: In the Column data format, choose Date, and then select the format you want. Make sure to change the destination cell and click on Finish.
And now you have all the dates in the valid format as shown below:
